| Salmon Construction
clock images for larger pictures |
||
| < Home | ||
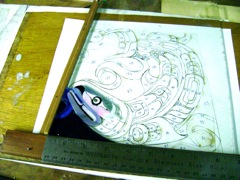
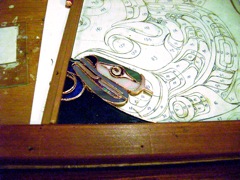
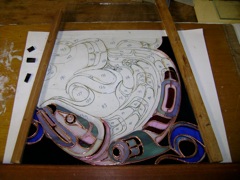
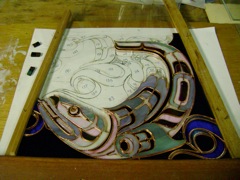
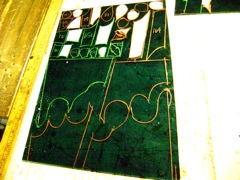
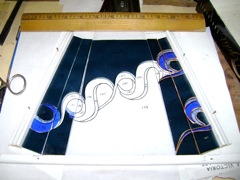
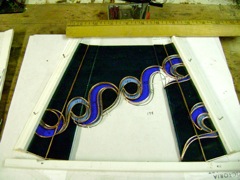
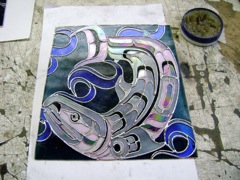
| The beginning of the process is to template on the proper color codes and organize aside for future cutting and grinding |
|
|
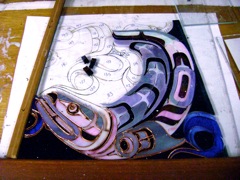
| Color code selection and the application of negative templates, this type of template serves to help organize and reference, both to location of the piece in the design and to facilitate to complex shapes and the smaller elements. | ||
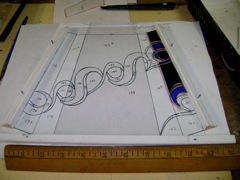
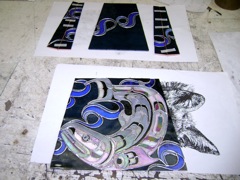
| Preparation of the master layout, during the cutting and grinding process, you match the piece to the master to assure that piece takes up only the space alloted to it. |
|
|
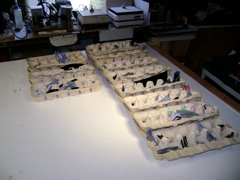
| All the pieces that represent the lamp are laid out and stored for future use, | ||
| Having to learn how to make the shapes of Hearolds designs have increased my ability to manipulate sheet glass. |
|
|
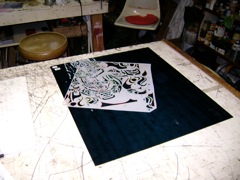
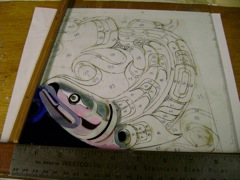
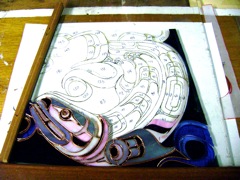
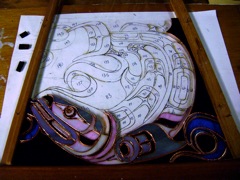
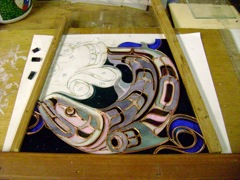
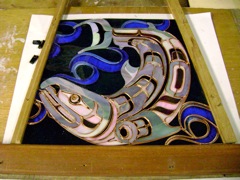
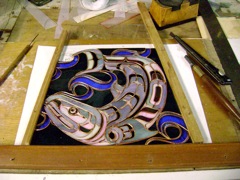
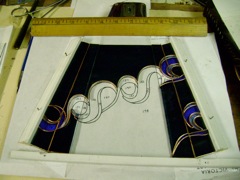
| Piece by piece, the face of the salmon starts to present its self. |
|
|
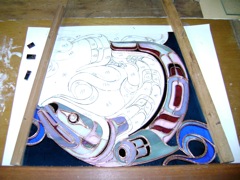
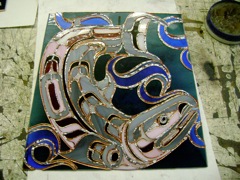
| Working the whole edge of the design maintains a steady reference to being able to assure proper registration of each successive piece. | ||
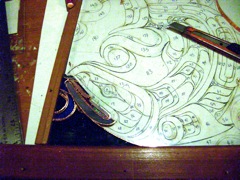
| Before I get to deep in the cutting and grinding, I catch up on the foiling and to assure after the foiling process, there's still no encroachment on pieces yet to be done. |
|
|
| Having learned how to cut and grind his shapes, foiling those same shapes was a leaning curve as well. | ||
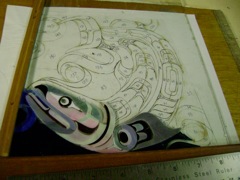
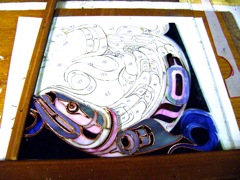
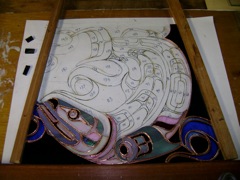
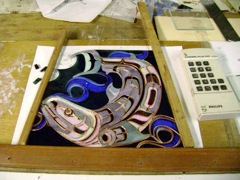
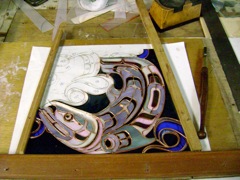
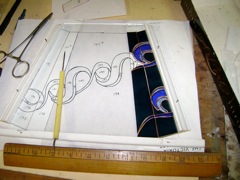
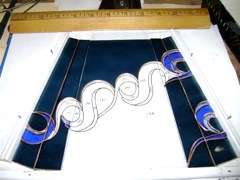
| Two edges are now established and now the center elements can be started. |
|
|
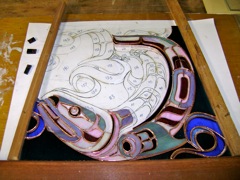
| The complex nature of his shapes , the constant turning elements makes registering each piece an essential and when a piece is as long and thin as the black accent line definitely keeps you on your toes. |
|
|
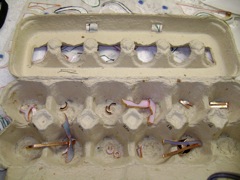
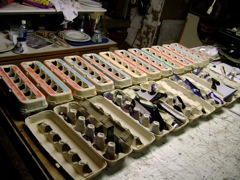
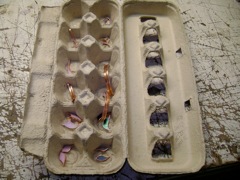
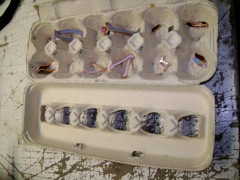
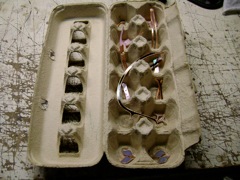
| Most lamps are repeated 2,4 or as many times as required, with that, the registration of each piece on the master must be done because as each piece is registered and put aside in an organized and accessible containers, yea egg cartons, when the registered pieces that are placed on the master, the successive pieces are foiled as well. | ||
|
|
|
|
|
|
|
|
|
|
|
|
|
|
|
|
|
|
|
|
|
|
|
|
|
|
|
|
|
|
|
|
|
|
|
|
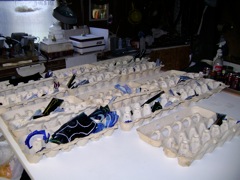
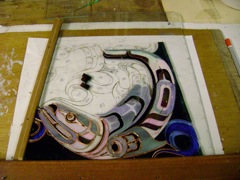
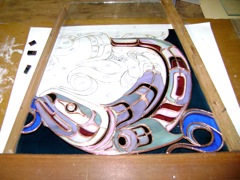
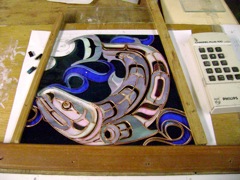
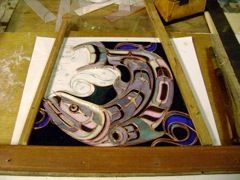
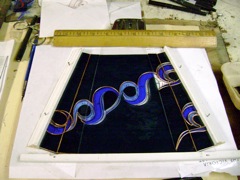
| All but cut and ground, ready for soldering. |
|
|
| The closed cartons have cut ground and foiled elements, the carton in the front are laid out and sorted to color and are represented on the master using a numbered system, the egg cartons are numbered to the shape on the numbered master. | ||
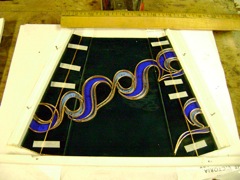
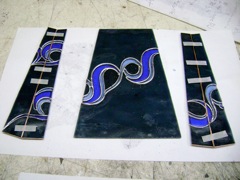
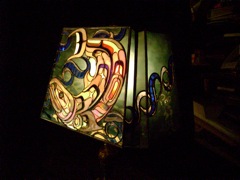
| For this particular salmon lamp, I decided to continue the wave action all around the lamp, unlike it's predecessors. |
|
|
| To assure the lines going from one plane to the next, lining them up on your master will assure that they'll line up when applied to the mold. | ||
|
|
|
|
|
|
|
|
|
|
|
|
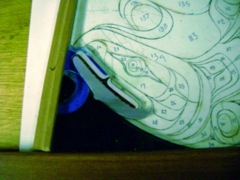
| With small type templates, the planes can be stabilized for tack soldering and mold placement. | ||
| Now it's completely foiled and the register is accurate, the soldering process can be done. |
|
|
| Face plate is soldered and rechecked. |
|
|
| The running of the back , notice now how the beveling of each piece creates that lovely wedge for a much stronger soldering process. | ||
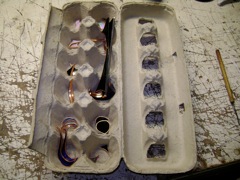
| Two salmon requires two of each shape, these are ready for their proper placement. |
|
|
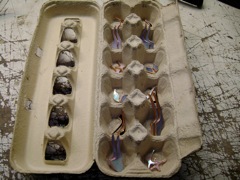
| Each piece is prepared for application in a numbered compartment relative to the numbered master. | ||
| Keeping such small pieces in an organized numbered and accessible compartments, makes assembly a lot less confusing. |
|
|
| Face plate and sides all soldered and ready to be put on the mold for final assembly. | ||
| One of two end panels ready for final assembly. |
|
|
| After the soldering process has been done, one of the many cleaning processes is applied, it's a lot more thorough than cleaning all the small and complicated shapes with more thoroughness. | ||
|
|
|
|
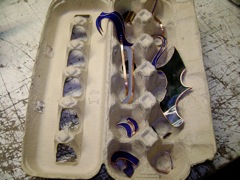
| Complex shapes waiting to be used, there are the makings of two salmon represented here. |
|
|
|
|
|
|
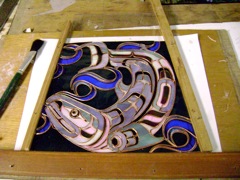
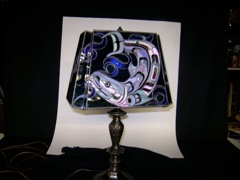
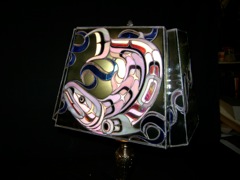
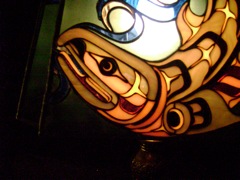
| All done, this lamp was a commissioned piece, and the client requested that we not use the black iridescent back ground glass. So to mitigate the hot spot from the light's source, I sandblasted the interior of this lamp. | ||
|
|
|
|
| The lamp has a quiet glow, uniformly throughout; lighting all the elements at the same intensity. | ||
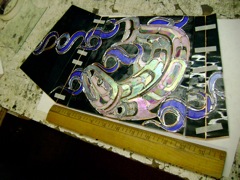
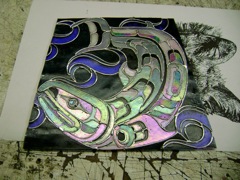
| A detail shot of the fine lines and complicated shapes of a Hearold Alfred design. |
|
|
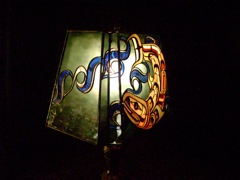
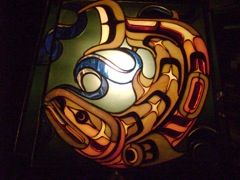
| I elected to leave the active parts of the water elements alone to give them more movement compared to the sandblasted balance of the lamp. | ||
| A detail shot of the side and face plates coming together and how all the prep work comes together. |
|
|
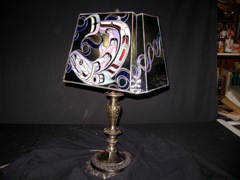
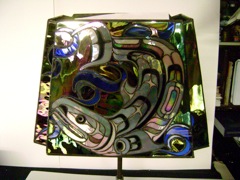
| This lamp was made shortly after the previous lamp but with the true colors we originally had designed the lamp. | ||
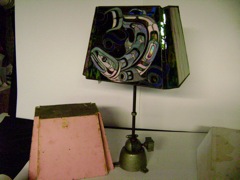
| Finished lamp and master mould. Notice how on this lamp, the waves don't go all the way around the lamp. |
|
|
| This lamp was and sandblasted as well to remove the hot spot created by itÄôs light source. | ||